
create documentation
Paragraph
Before 3D printing, you need to slice your model file using PrusaSlicer, and the first step is to import your model into PrusaSlicer.
Step 1: Click the 'Add' button on the left of the grey bar in the top middle of the screen. You can also drag your file onto the build plate on the screen.

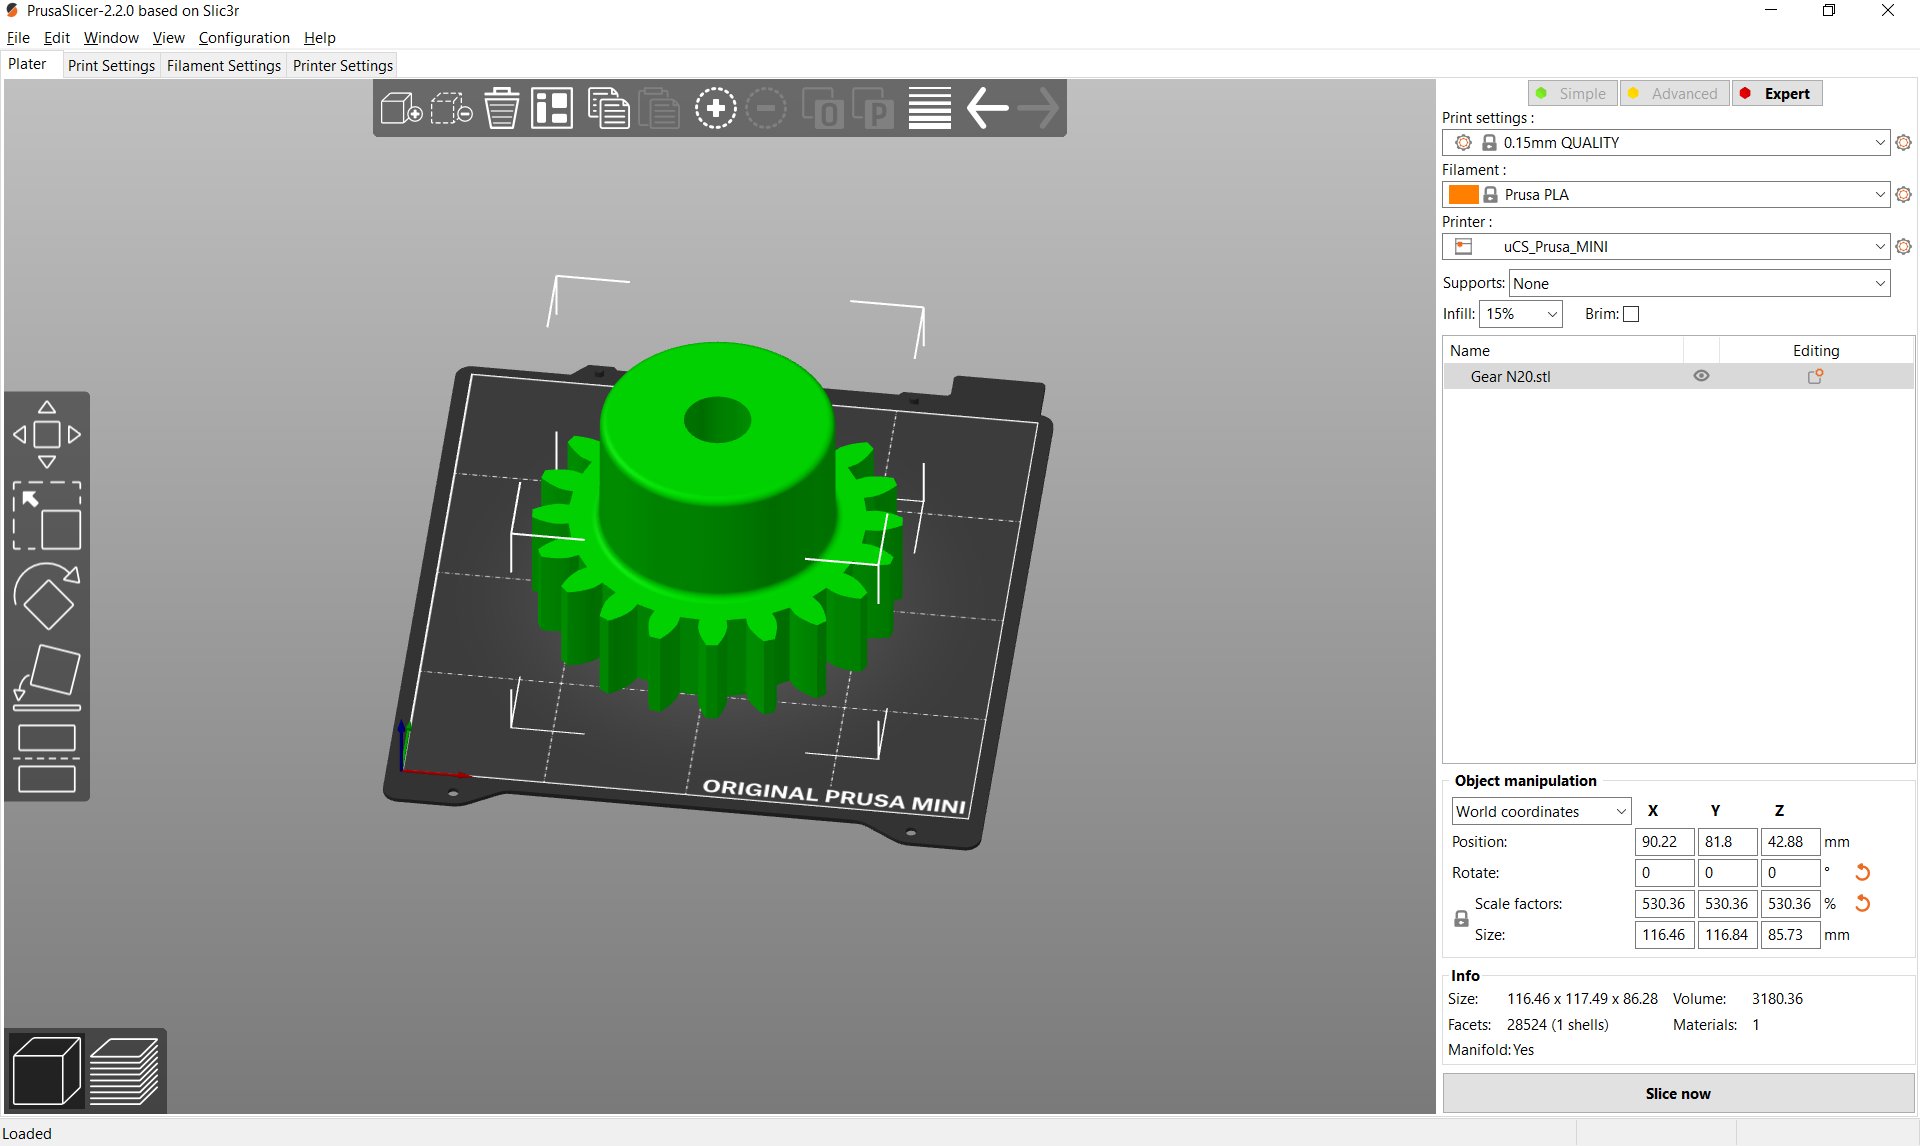
Step 2: Make sure that your model fits in the build space. The colour of your model will be green if so (and orange if not selected).
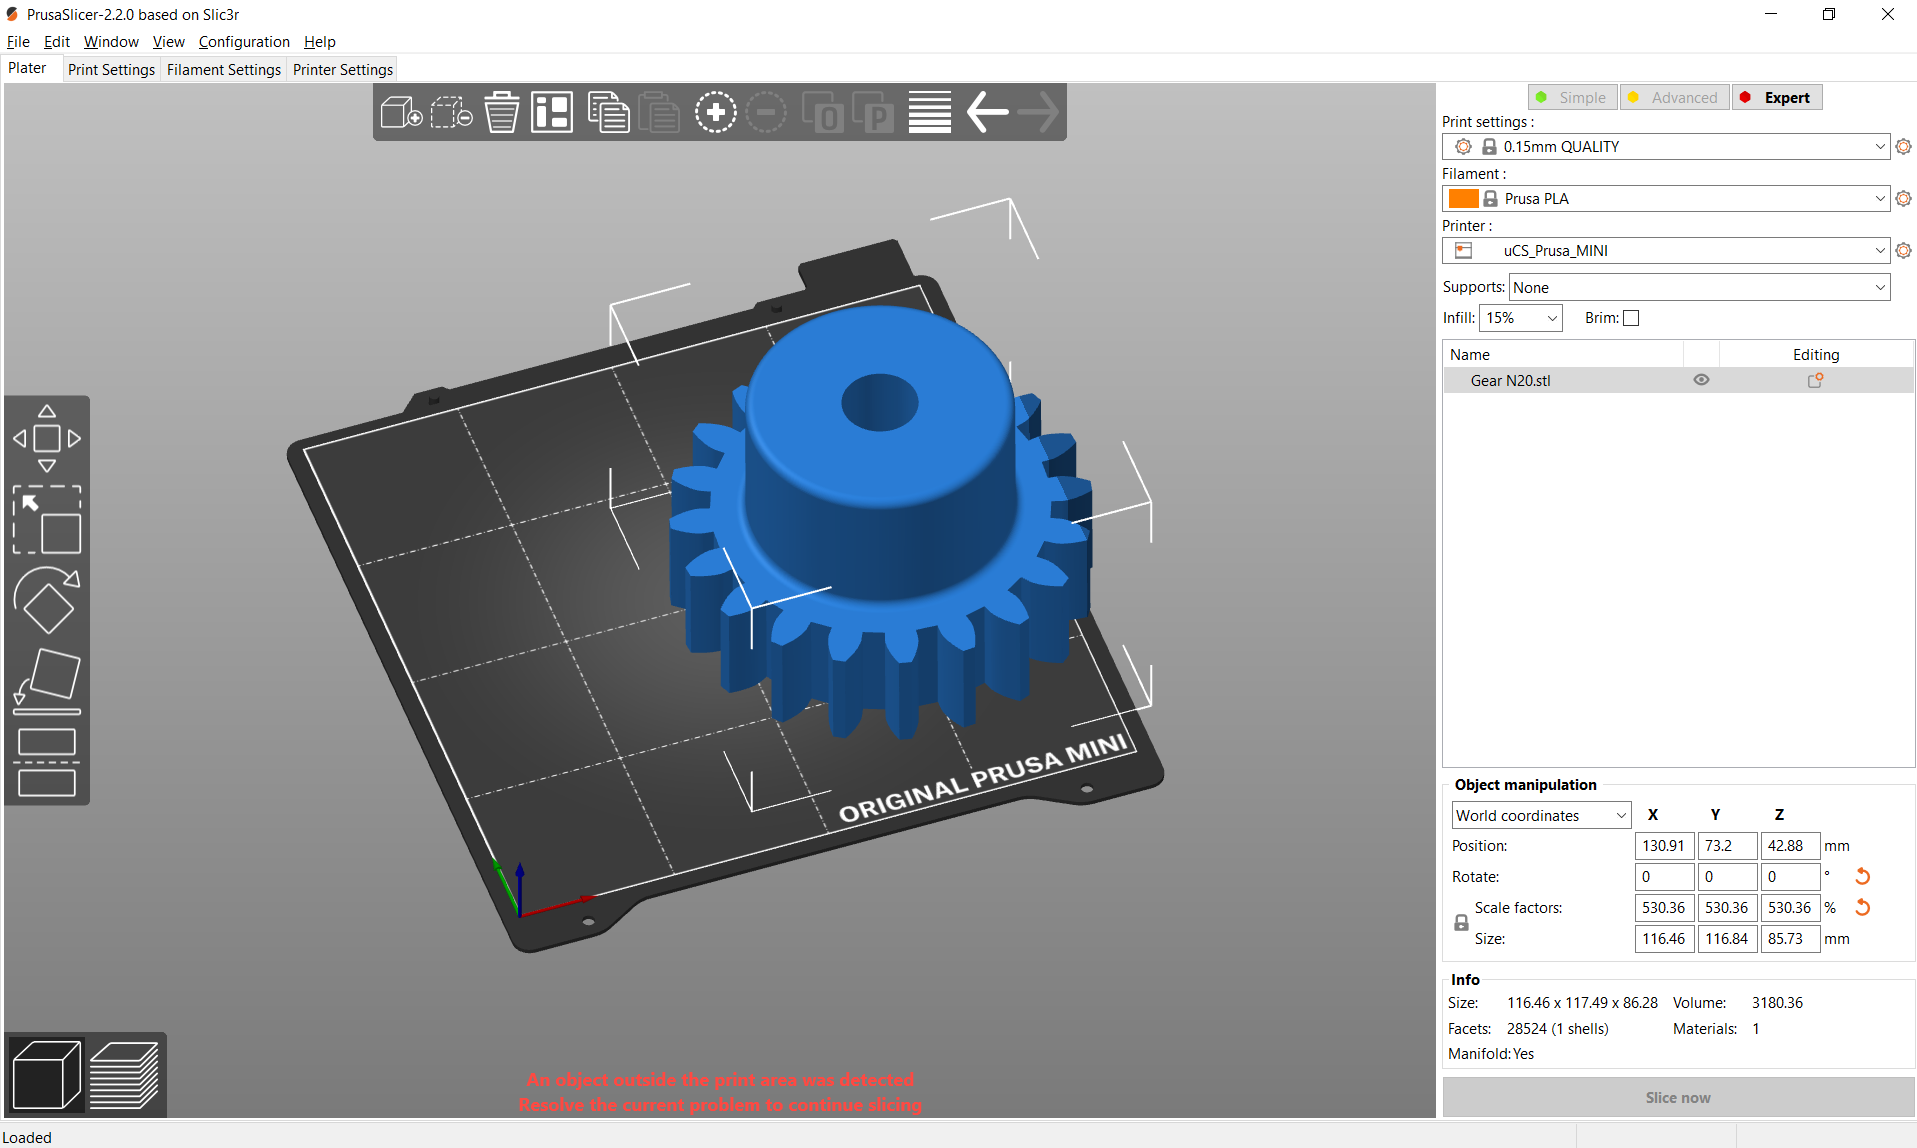
If your model’s colour is blue it is extending outside the print area - this either means that your model is too big or needs repositioned. An error message will appear at the bottom of the screen.
Support