

What are LiDAR scanning targets?
In LiDAR scanning, targets are used to help the registration software (which pieces multiple of your scans together) to align multiple scans.
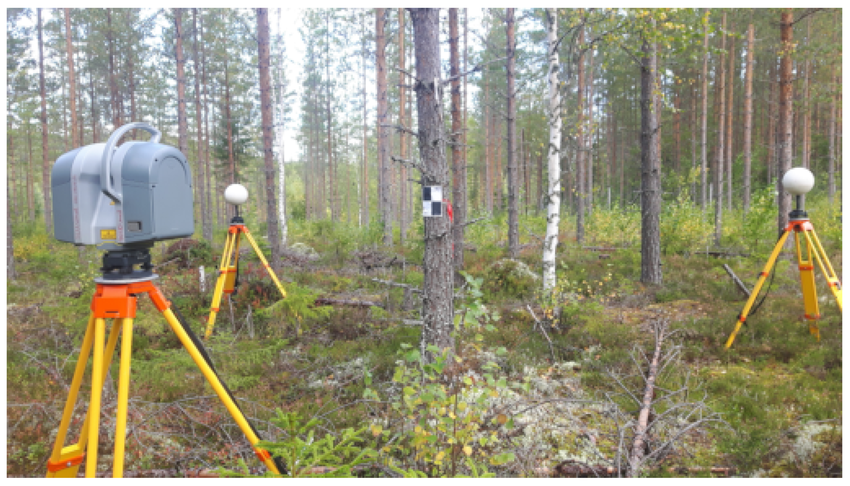
Targets can take a few different forms, at uCreate we use circular black and white targets. Each of the LiDAR mission bags comes with a set of 8, 4.5 inch targets (stored in the mission bags front pocket).
These targets are designed to sit on the ground (or flat surface). If you require stakes to push into the ground, please let us know when you take out the scanner as these can be provided.
For tips on how to set up and align scans using targets, see below.

When should I use LiDAR scanning targets?
LiDAR scanning targets are useful when the area you are scanning is going to be difficult for either the registration software to automatically align, or for you to manually align. Difficulties in alignment is usually caused by different areas of the scan looking the same (or very similar). For example:
- A large area, especially where you might not have a large overlap between your scans.
- An area where everything looks the same, like a long corridor.
- A vegetated area, like a forest or park.
Setting up the targets.
When placing the targets around your scanning area, ensure they are all at different heights.
Do not move targets once they have been placed, unless that area will not longer appear in your scan.

You should always have at least 3 targets visible when scanning, therefore use a minimum of 4 targets in your scanning area. We recommend doing a test scan if you are unsure enough targets will be captured during your scans.

The placement of your targets will depend on the resolution you are using for your scan. You should be able to see the cross of the target on your scan.
Run a test scan at your desired resolution and see if the distance needs adjusting. As a guideline for low resolution, the target should be no more than 2m away and for high resolution no more than 10m away.

Label the targets in Field 360 on the iPad, this will save you time when importing your data into Register 360.
You can add targets via the pin icon on the scanning screen. We recommend labelling the targets with the same numbers as they are labelled on the target bases.
Using Targets to Align Scans in Register 360.
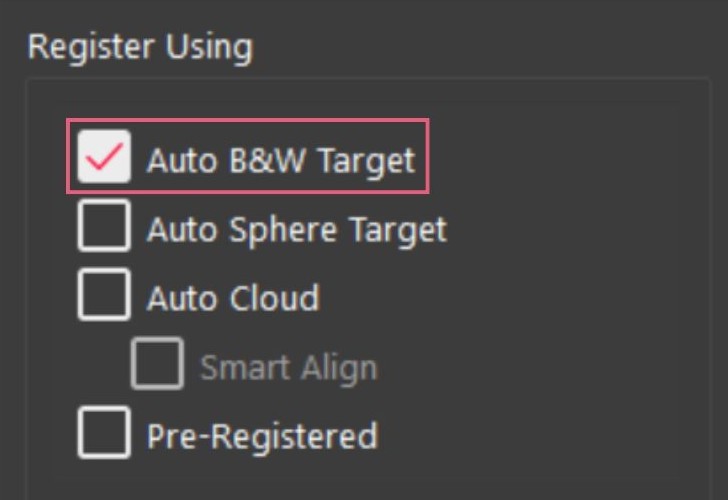
When importing into Register 360, you can select 'Auto B&W Target' which will import and align your scans based on the targets it detects.

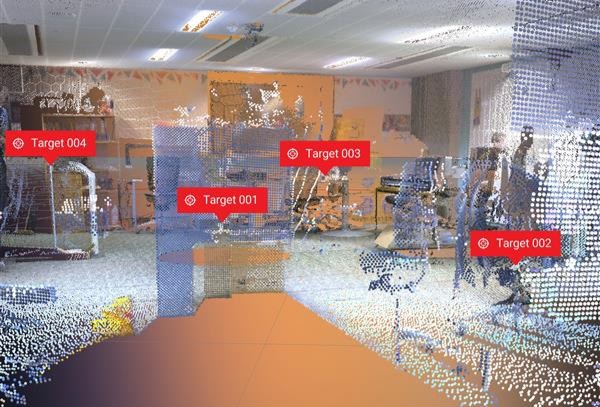
Targets assigned to your scans on Field 360 (on the iPad) will appear are 'Geotags' (grey icons) on Register 360. Targets assigned to your scans by Register 360 will appear as red crosses.
Having both helps you to know all targets have been detected by Register 360.

If you need to edit the detected targets, or add targets that have not been detected by Register 360, while in the 'Set-up Cloud' view, click the edit targets icon (pictured above).
This button is in the top bar menu. If you cannot see it, try extending this section of the page view.
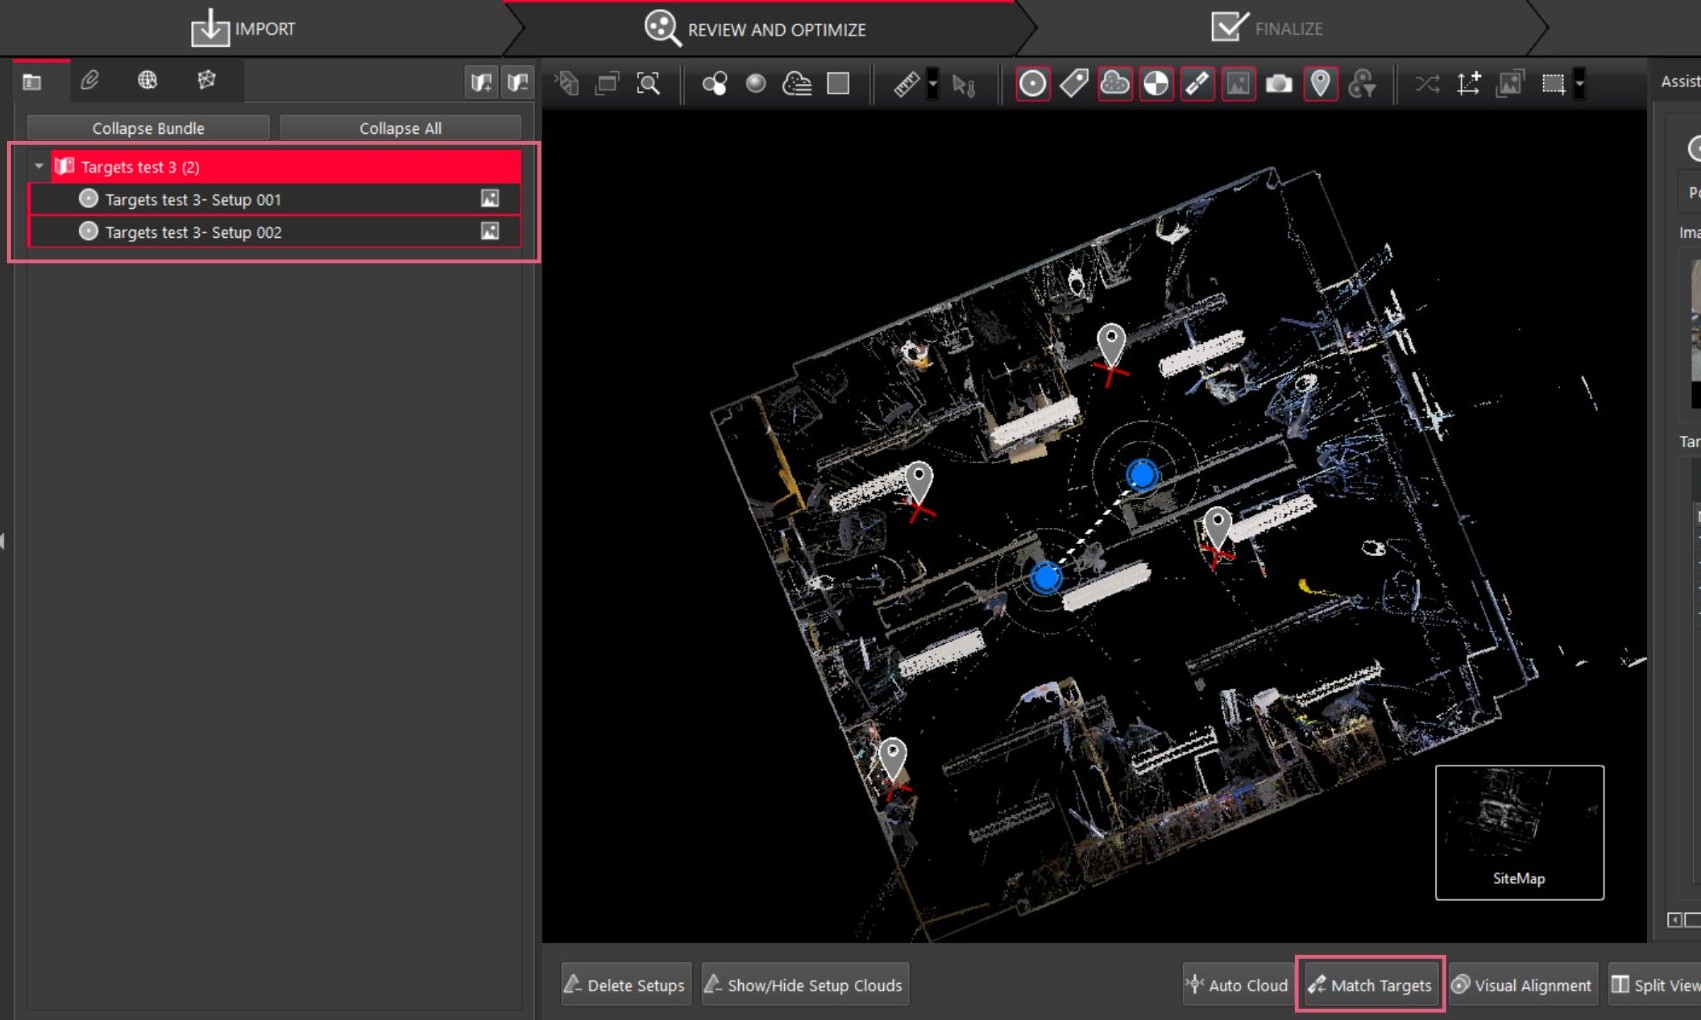
To align scans based on targets, if not done automatically on import, select the scans you want to align and click 'Match Targets'.
Once targets on multiple scans have been matched up, they will appear as green crosses.